|
Installing & Running ASP Printer COM In The Windows COM+ Component Services
This article explains how to install and run ASP Printer COM component in COM+ Component Services in Windows 2000, Windows XP and Windows 2003. It also applies to Advanced PDF Printer component and Raw Data Printer component.
You will need to follow this procedure if you are using the component from ASP pages or ASP.NET pages and the component does not print. This is not required if you are running the component from a compiled EXE application (e.g. VB application, C++ application, .NET application, etc.).
Problem & Cause: When an ActiveX COM component (DLL) is used from within a ASP page, the created object will run under the SYSTEM identity (account) and therefore it has the permissions of that identity.
By default, there are no printers installed under the SYSTEM account. Because of that, ASP Printer COM will be unable to see any of the printers installed on the system.
Resolution: By installing the component in the Windows COM+ Component Services, we can specify the Windows identity (account) under which the component will run. Thus, we can choose an account that has enough permissions to access and print to any one of the installed printers (the printers have to be installed and accessible from within that account).
To install ASP Printer COM in the Windows Component Services, follow the steps below:
Note: Before you start the following procedure, it is strongly recommended that you restart IIS (Internet Information Services) in order to release the object and unload ASPPrinter.dll from IIS in case you were just using it from an ASP Page.
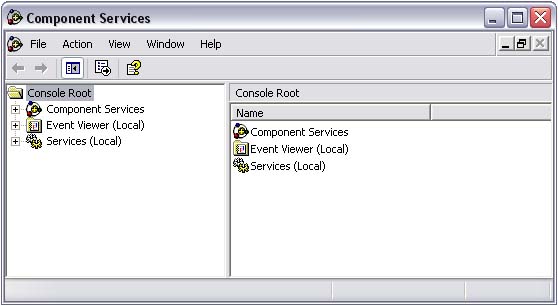
1. Open the Windows Control Panel, select Administrative Tools and then select Component Services. The Component Services Console (below) will open.
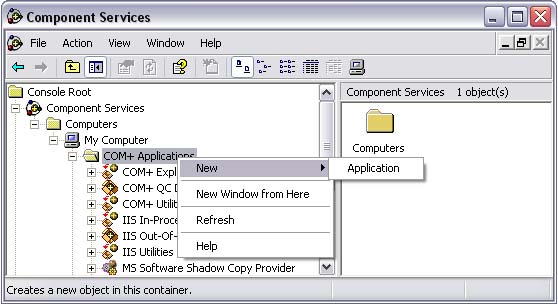
2. Double-click on the Component Services node to expand it. Double-click Computers -> My Computer -> COM+ Applications. Right-click on COM+ Applications and select New -> Application to create a new COM+ application (package).
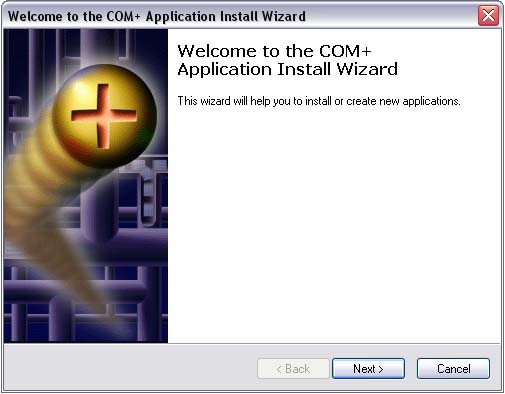
3. A wizard will start, click Next.
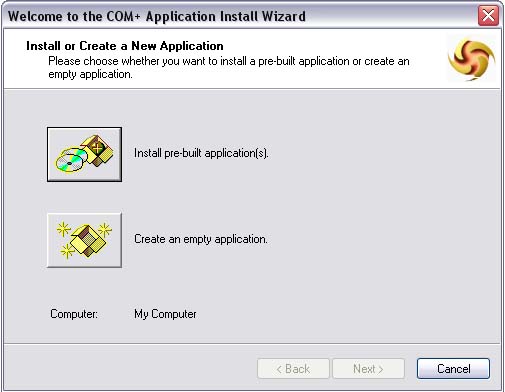
4. On the next screen, click the Create an empty package button.
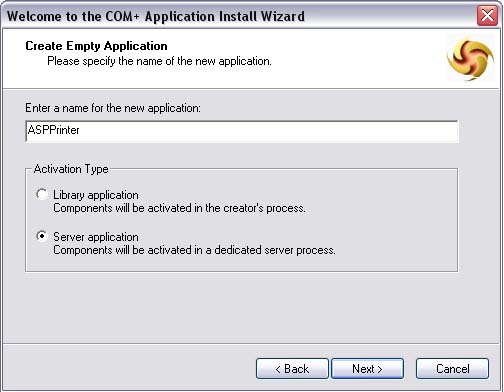
5. In the application name field, type ASPPrinter and leave the application type as is (Server application). Click Next.
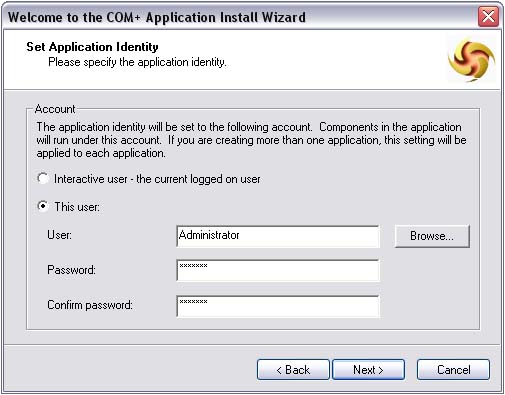
6. The next screen will allow us to specify under which Windows identity (account) we need the application to run. Select the This user option box and type 'Administrator' in the user field and supply the administrator account password. You can specify another account that has enough permissions to access, query and print to the installed printers. It is recommended however to use the local system administrator account to avoid any lack of permissions. Click Next.
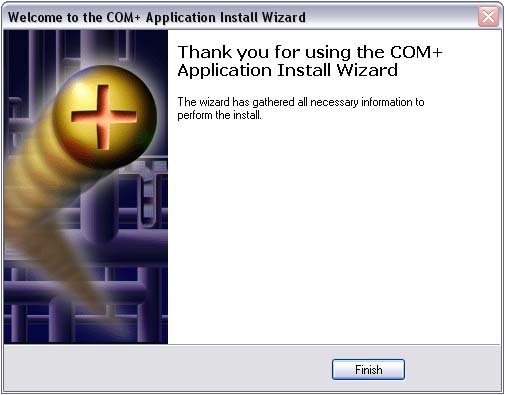
7. The wizard will now complete. Click Finish.
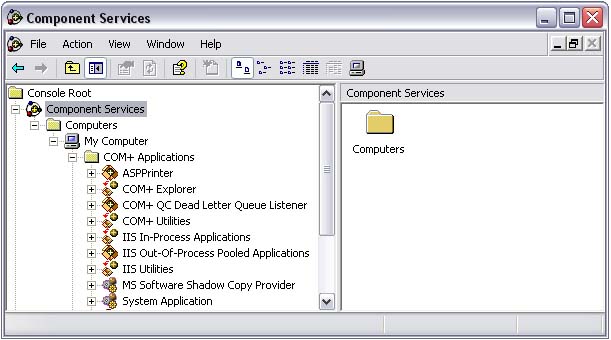
8. In the left pane, you will now notice that a new application (package) with the name 'ASPPrinter' has been created.
9. Now we have to add our component to the new package. Double-click the ASPPrinter package to expand it. Right-click on the Components node and choose New -> Component.
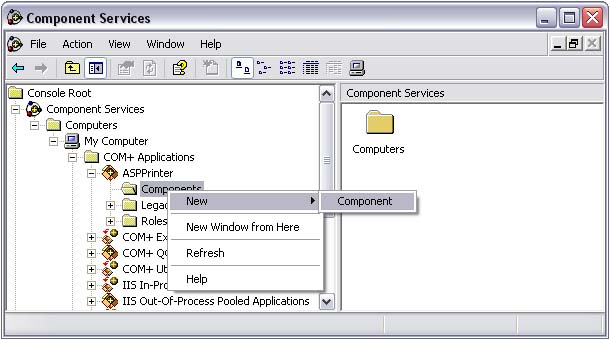
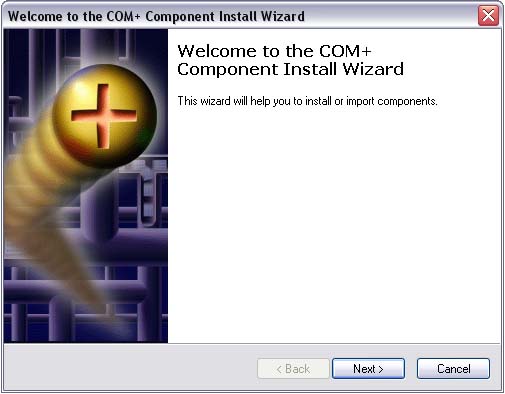
10. The component installation wizard will start. Click Next.
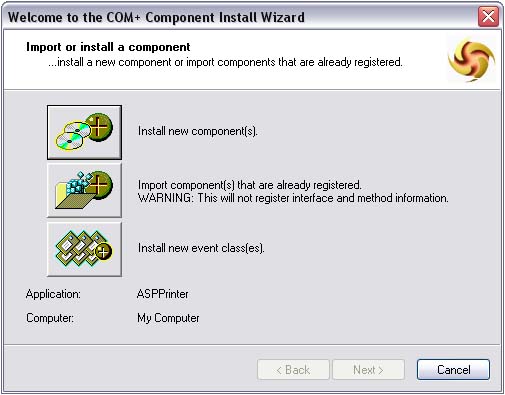
11. On the next screen, click the Install new component(s) button.
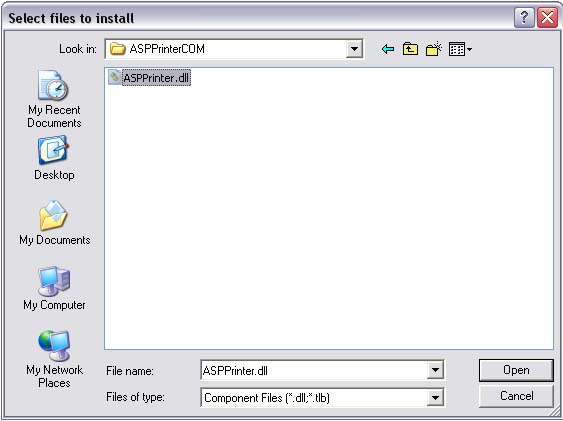
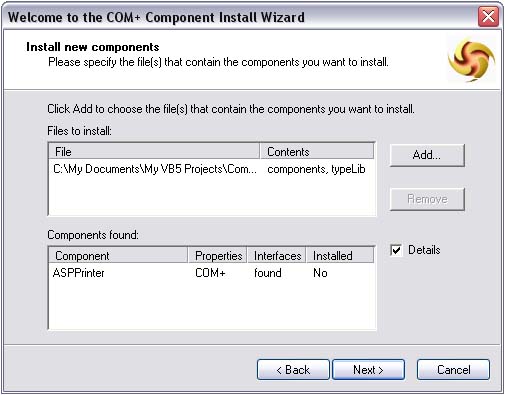
12. Now browse and locate the component (ASPPrinter.dll), select it and click Open.
14. A dialog will be displayed, showing the component properties. Click Next.
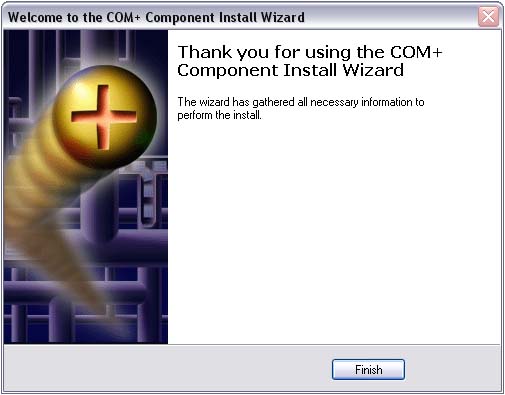
15. The wizard will now end. Click Finish.
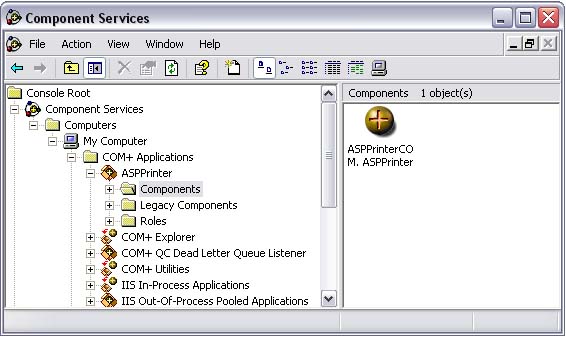
16. Now you will notice that the component was added to our package. The component will now run under the 'Administrator' account (in our ASP pages) and will have all the permissions of that account. It will be able to access and print to any local or network printers that are installed under the local administrator account.
|


